- June 15th, 2015
- /
- Birthday Invitations
- /
- 1 Comment
- /
- An Enchanted DIY Fairy Birthday Party – Part 3: The Party
For our final post on the fantastical Enchanted DIY Fairy Party, we’ll show you how it all came together. And be sure to check out our previous posts for the Fairy Party Invitation and more on the Fairy Party Decorations.
Of course, to have a fantastic Fairy Party, you need Fairies, food and fun party games. And “Fairy Hollow”…
As I mentioned in Part 2 – I wanted to do a garden party, but it was going to be about 110 degrees outside (summer in Arizona!). So we had to create a garden inside.
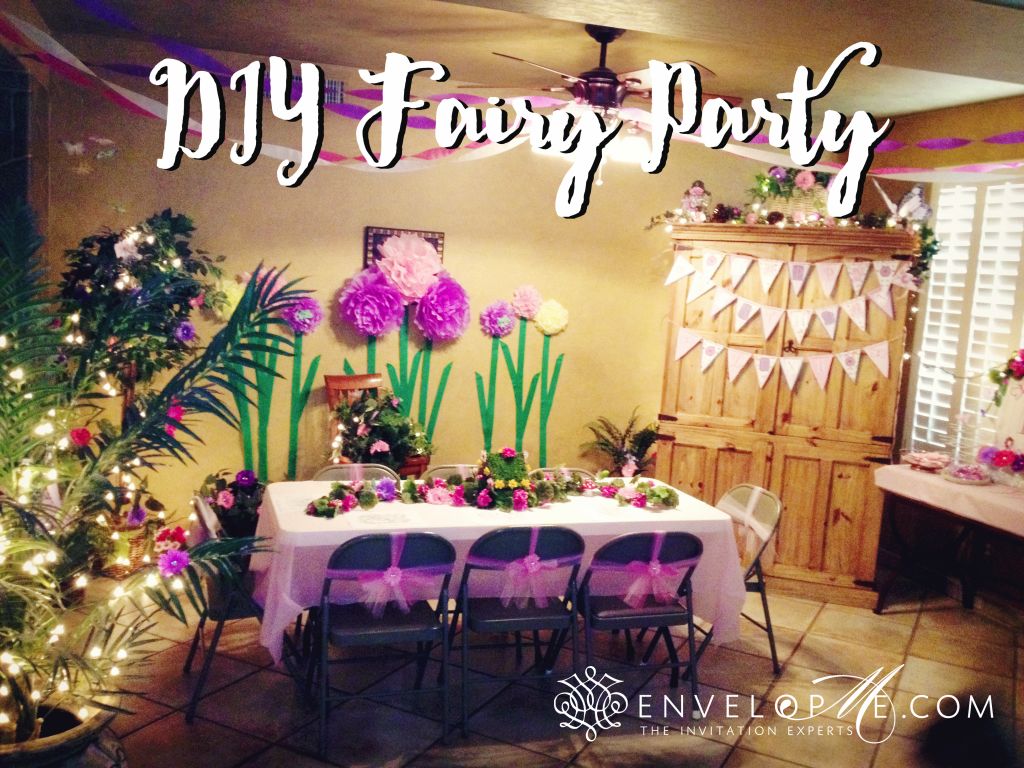
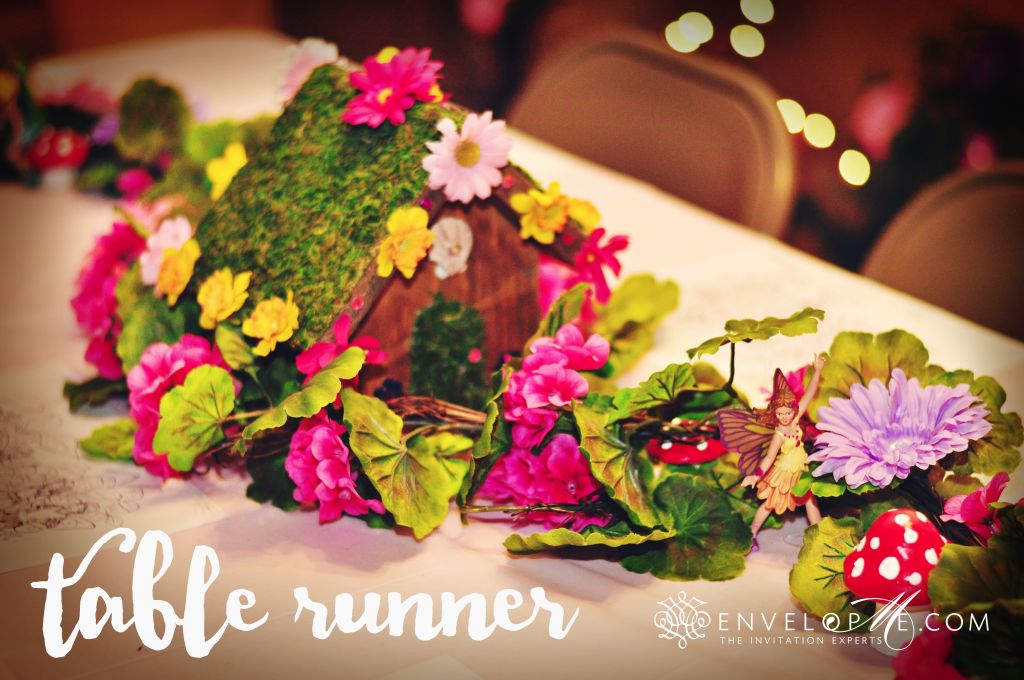
Here’s how the whole room looked once we had everything together. Along the back wall there was greenery at various levels with silk flowers, butterflies, and white lights. On the wall, we made pom-pom flowers – three HUGE ones in the center (full sheets), and two sets of three smaller ones (half sheets) on either side (see previous post –Fairy Party Part 2 for more decor how-to’s and links for the pom-pom flowers). Each chair had a tulle wrap with a silk flower in the middle. And our little fairy house and red mushrooms were placed on the table with a floral garland (garland was purchased from a local craft store). We also set out coloring pages and crayons (not pictured) as an activity for the guests as they were arriving.
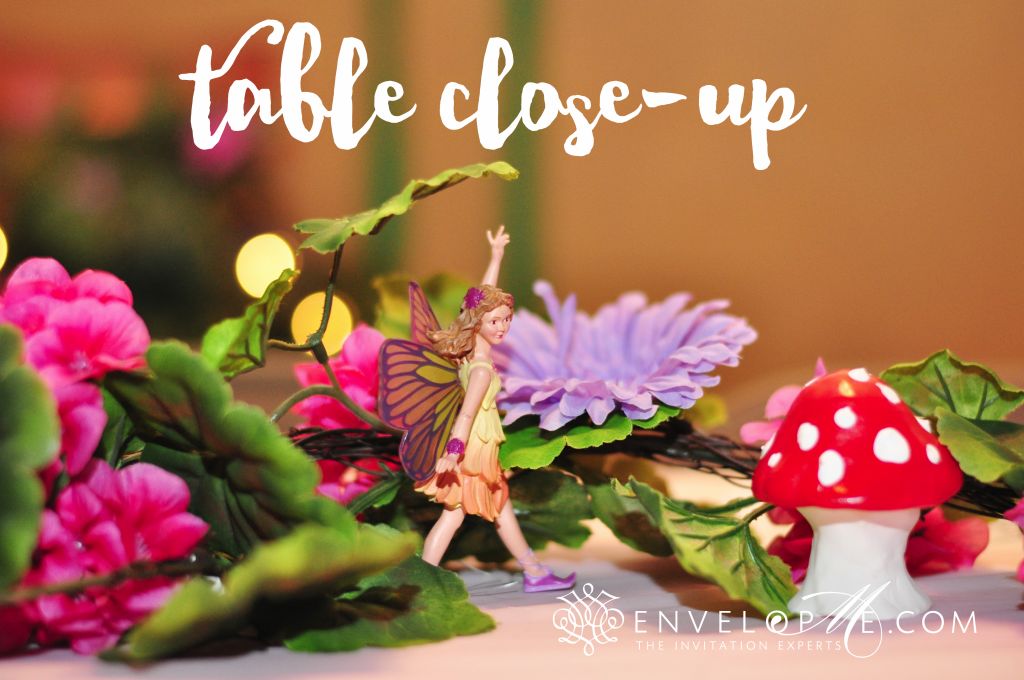
Another great find were these cute little fairies. I found them in a clearance bin while at the craft store and set them among the flowers on the table. If you need fairies of your own, Amazon carries the actual Flower Fairy Figurines that are gorgeous but made of resin (fragile) and a little pricey. If you prefer your fairies as plastic toys so your own little fairy can play with them, these Fairy Figurines are much less expensive and still pretty cute (but somewhat smaller).
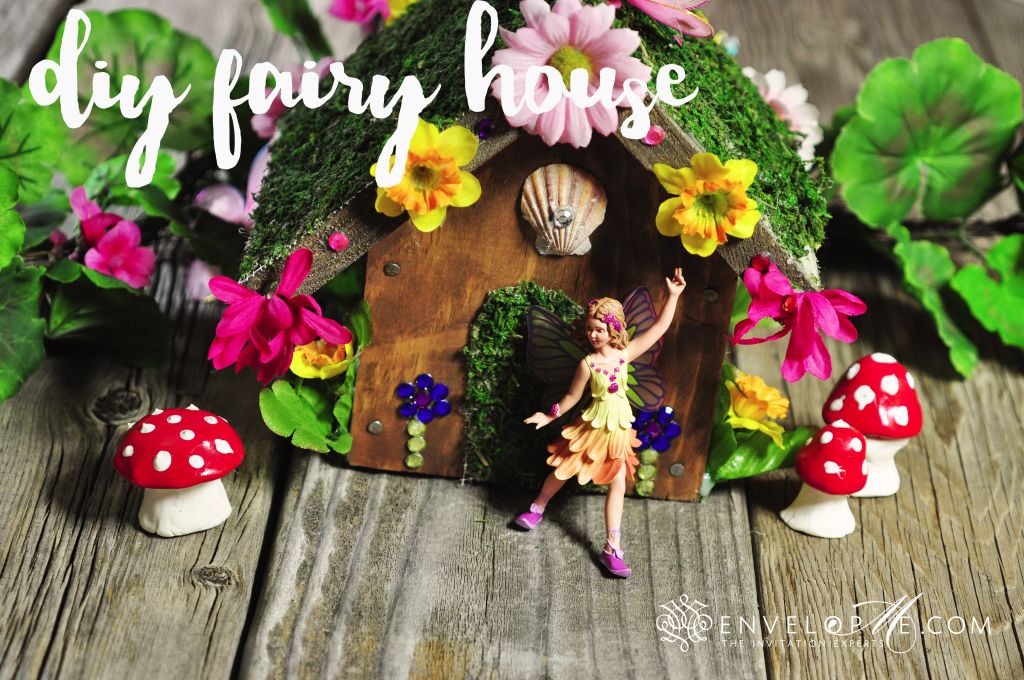
Here’s another look at the Fairy House – sized just right for our little fairies.
And a close-up of the table runner, like a magical garden with little surprises… fairies, flowers, butterflies and fairy mushrooms.
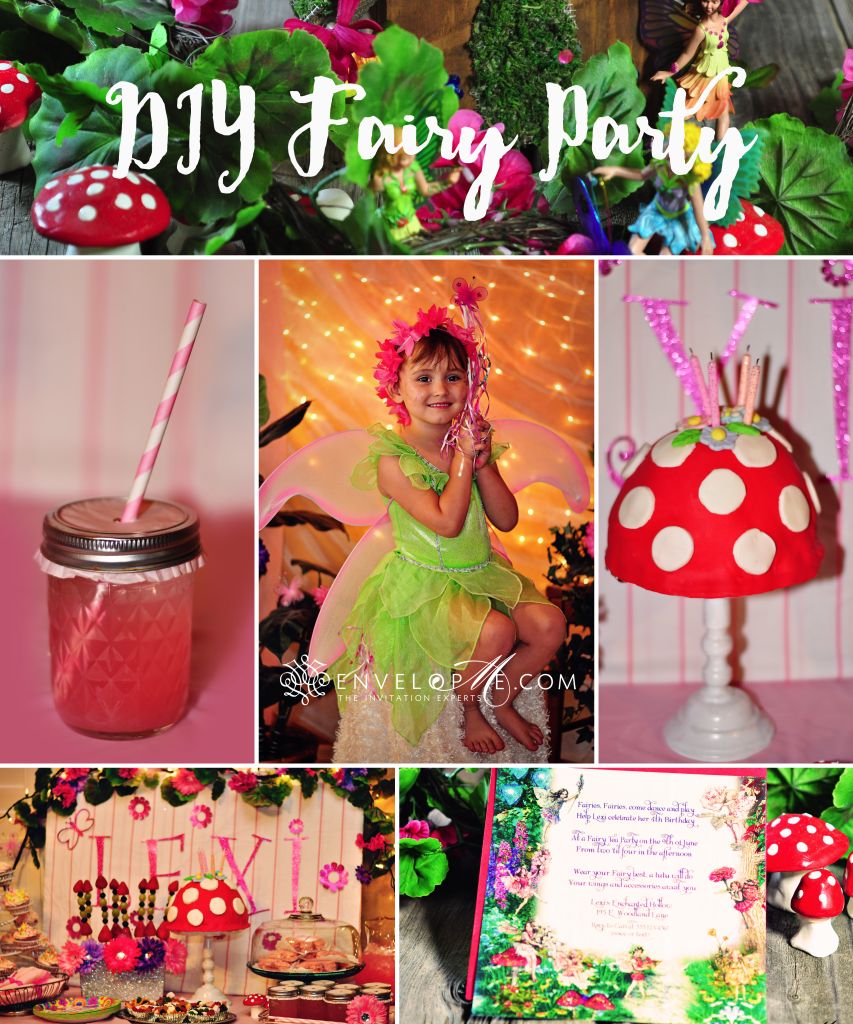
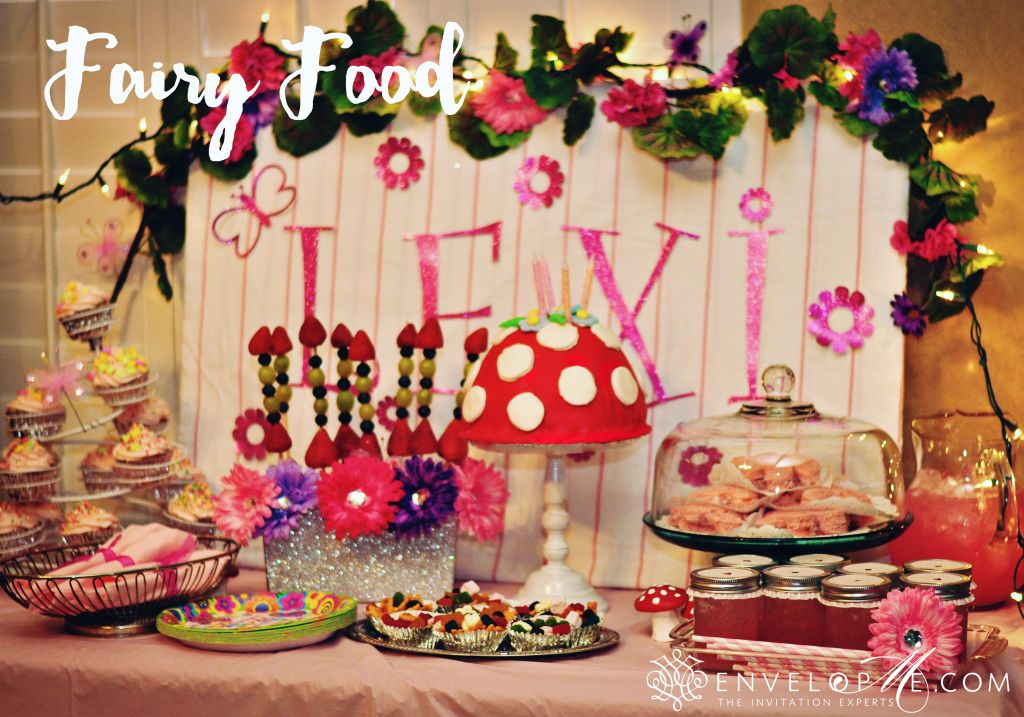
The food table featured Pink Fairy Flower Sandwiches (homemade white bread with a few drops of pink food coloring added before baking, filled with cream cheese and jelly, cut in the shape of a flower and served on a doily), Fairy Salad (gummy fruit snack fairies, colored mini-marshmallows and goldfish – OK, it’s not a healthy salad, but this is what little fairies like to eat :-), Fairy Fruit Wands (fruit on skewers – I used a floral styrofoam block inside the glitter basket to stand up the skewers), Fairy Cupcakes (on my terribly-tippy springy spiral cupcake stand – don’t buy one of these!), and my favorite – the Fairy Mushroom Birthday Cake.
For the cake, my usual style of birthday cake decoration is to just buy toys that go with the theme and stick them on top – quick and easy. This cake took a little more work… First off, I looked at the dome-shaped cake pans, and not only were they expensive, but I was pretty sure I’d fail if I tried that. I bake from scratch, but in no stretch of the imagination am I a CAKE BOSS. So I cheated. The whole cake is a giant rice crispy treat. You could form this in a bowl, but I just shaped it by hand directly on the aluminum-foil-topped stand. On top of the rice krispies is a layer of regular frosting to smooth things out and help the fondant stick. I made marshmallow fondant and used that to cut out the little flowers & leaves on top of the cake, as well as the big white dots. (Marshmallow Fondant Recipe) The marshmallow fondant was really easy to make and YUMMY (but you need a SUPER POWERED MIXER or really strong arms – I did it in a breadmaker on the dough setting and it worked, but pretty much killed the motor. The good news is that since I killed my bread maker, I now have a Bosch. Score!) I tried about three different versions to get a decent red for the main area of the mushroom, but all of the red colors turned out horrid – from Pepto Bismal pink to a yucky blackish red! So I ended up ordering the Red Fondant… from Amazon of course. This was my first time ever using fondant, and while it wasn’t perfect, I was happy with the way it turned out. Don’t be afraid to try it!
And to drink, Pink Lemonade in pint jars. We used cupcake liners with holes punched under the lid rings to hold the cute striped paper straws in place.
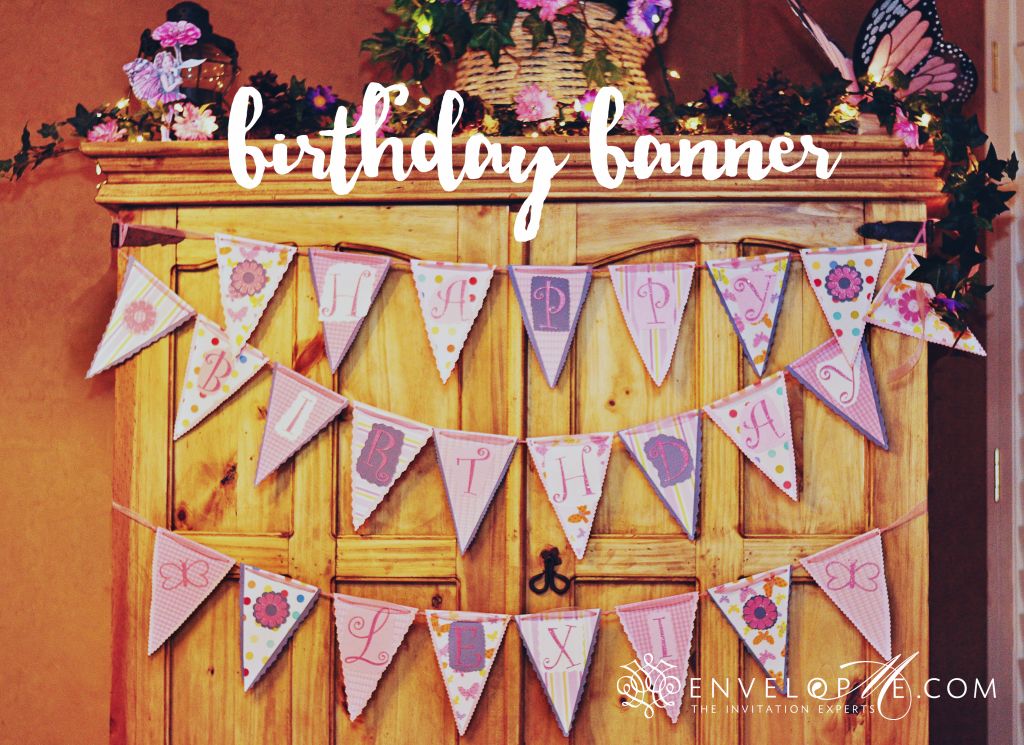
Here’s the birthday bunting/banner we made. It’s just layers of plain & patterned cardstock cut with a scalloped scissors. Letters & shapes are laser-cut out of glitter paper (but you could totally just print them on regular paper and cut them out with the scalloped scissors). Then we punched holes in the corners to string on ribbon. Cute and colorful!
For the Activity portion of the party, here’s what we did:
Upon arrival, each guest received wings, a halo, and a wand, as a favor to keep. We took her picture against the fairy backdrop (see part 2), and then she could color her fairy coloring sheet (we used a free download from flowerfairies.com). Once the guests had arrived, we read a story about the Flower Fairies having a Fairy Ball (“Fairy Whispers” from Amazon ) and then let the girls dance in their costumes at their very own Fairy Ball.
Our party also included crafts: we made fairy dolls out of round wooden closepins like these but I think they’re quite a bit less expensive to pick up locally from a craft store (usually in the wooden section). To these we added wings made from coffee filters tied on with pink pipe cleaners that doubled as arms for the dolls, yarn for hair (had different colors so the girls could choose) and dresses (a felt rectangle glued around the doll – no sewing). Black sharpie made the face – we are very skilled here :-). We used hot glue, so it took grown-ups for that part.
The second craft was to mix up your own bottle of pixie dust. We got tiny shaker containers like these from the craft store (again, I think the craft store will be less expensive than Amazon in this case) and let the girls decorate with jewel stickers and fill with a mixture of colored glitter from bigger bottles. There are more pixie dust favor ideas on our pinterest page.
We also did a little fairy treasure hunt. Each girl had a little brown bag to decorate, then we all went to the back yard and looked for fairy treasures (these included $1.00 store bracelets & rings, wrapped candy, sticker sheets, and fake jewels). It was hot – like 110 degrees – but the little fairies loved the treasure hunt for the short time we were outside.
And we ended with the fairy tea party & cake (but watch out for the glitter in your food!).
As a bonus, we were able to re-purpose many of the decorations to redo my daughter’s room into a fairy hollow after the party.
I have been a professional graphic designer for years, and love to create professional invitations and communications. But other than that, I don’t consider myself “crafty” in any way, so feel confident that you can do this too! This has been my daughter’s favorite party ever. Hope it helps you plan yours.
Here’s the link to Part 1 – The Fairy Invitation and Part 2 – Fairy Party Decorations. We specialize in custom invitations, so let us know if we can help you create something fabulous!


Pingback: An Enchanted DIY Fairy Party - Part 2: The Decorations - EnvelopMe.com